Getting Started With Seeds and Seedlings
You may have decided to get started with seeds and seedlings and are looking for some tips to get you on the right path. This article will give you some helpful information on re-potting and watering your plants from the bottom up, as well as fertilizing and transplanting your plants into the garden.
If you follow this advice, your plants will grow healthy and strong and you will be able to enjoy some wonderful fresh vegetables and fruits.
Watering from below
Many people enjoy watching the water level in a bowl slowly drop. However, it is important to remember that the top is not the best place for your seedlings to soak up liquids. Water should be able to get down to the roots without disturbing the fragile growth.
The best way to water seeds and seedlings is to follow a few simple steps.
No products found.
This will help you avoid over-watering and disease. Start with a seed tray, which is a solid container designed to hold soil. You can then use a spray bottle or mister to apply water to the soil.
Make sure you keep an eye on the water level, as excess moisture can easily rot or uproot your plants.
A good quality seed tray should also have holes to allow for drainage. This will also help with watering, as the drainage holes will encourage the soil to absorb more liquids.
Another thing to consider is a humidity dome. It can help to hold the moisture in the soil around your seedling, which helps prevent it from drying out.
Alternatively, you can get a small water catch tray to collect extra water from the pot. This can then be reused again. Some even claim that bottom watering is not as dangerous as many people think.
The most important thing to remember is that seedlings need regular care and attention. If not, they will quickly become weak and will die. In fact, young plants have a tender root system, which is easily uprooted.
So, it’s a good idea to monitor the weather and check your seedlings daily to make sure they’re getting enough moisture.
One of the most obvious mistakes people make is to over-water. Overwatering can lead to rotting or root rot, which will harm your seedlings.
The other thing to remember is that your seeds need different amounts of moisture. Smaller seeds are more vulnerable to this type of problem. Using a mister, or spraying the seeds with a gentle spray, will help to avoid over-watering.
Re-potting
The benefits of re-potting your seedlings and seeds are numerous. You can avoid transplant shock and get your plants off to a good start with a new home. And since you’re re-potting the seeds, you’re not losing the nutrients from your previous pot, too!
While it’s important to note that there’s not one correct way to re-pot your seedlings and seeds, there are a few best practices you should follow.
First, make sure you’re not going to disturb the root system. If you don’t, you’ll be left with a plant that isn’t happy. Next, a good time to re-pot is when your plants have outgrown their original container.
The most basic re-potting method is to transfer the seedlings into a new pot. This will help you avoid crowding and prevent rotting and mold. Also, you can fill in the pot with potting soil. A lightweight mix is usually the best choice.
To determine the right potting mixture, you should consider the amount of soil in the original container, the type of roots you’re dealing with, and the target transplant date. If your seedlings are small and tender, they’ll benefit from a lightweight, nutrient-rich potting medium.
Make sure you label your containers. Labeling is a great way to keep track of your plants. There are many tools for marking plastic containers, but you can also use painter’s tape. It’s also a good idea to include a plant tag, so you can identify your seedlings later.
Lastly, remember to water your newly repotted plants. Watering them correctly will ensure they’ll be ready to sprout. For the best results, you should water them twice a day. With the proper care, you’ll have a healthy, happy plant that’s ready to grow.
Hopefully, you’ve learned some new re-potting tips to add to your growing toolkit. Whether you’re a novice or an expert, it’s always a good idea to check your seedlings and seeds from time to time. Don’t forget the most important part: caring for your plants.
Whether you’re growing a flower garden, a veggie patch or a fruit tree, taking the time to nurture your plants will pay dividends in your crop’s success.
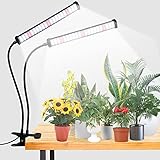
- 【Super Bright with More Heat Production】built-in 144 white + 10 red LED beads, the grow lamp is similar to the full spectrum sunlight at noon,that is professionally designed for indoor garden plants.Also,this growing light connect with an high output plug,which illumination will be more stable, brighter,and more efficient.
- Timer Function & Multiple Settings – this growing light offer the timer function with 3 options that is 4Hrs or 8Hrs or 12Hrs, it is based on a 24 hour cycle from the time you set the timer.For example,when keeping power ON, if you select 8 Hrs,it will turns ON for 8 hours per 24 hours.In addition, this table lamp allows you to adjust the brightness.
- Easy to Install – with flexible Gooseneck & strong clamp,it allows you to place the growth light in any direction to provide the best lighting angle for your plants,meet the cover around the plant.
- High Efficiency LED Lamp – as for LED power draw this seedling lights just comsume about 36watts and is equivalent to a 100W Halogen Bulb.Estimately monthly cost roughly $2 in electricity (12 hours a day). It is a great gift if you growing some small house plants.
- 【365 Days Warrantty】GooingTop service team offer 365 days warrantty and 24h friendly customer service. If there are ever any issues about the product, please feel fre e to contactt us and we will send you a new replacement or fulll refund.
Last update on 2026-07-12 / Affiliate links / Images from Amazon Product Advertising API
Fertilizing
Providing nutrients to your seedlings is a very important part of the gardening process. If you do not give them the proper amounts of nutrients, your plants can develop lanky and spindly growth. Or they may even burn and dry up.
Depending on your garden goals, you can choose between synthetic or organic fertilizers. In either case, your seedlings should be watered once a week. A weekly application can help prevent desiccation.
For seedlings, phosphorus is a crucial nutrient. Phosphorus promotes root development. It also helps your plants resist shock after transplant.
Most common fertilizers designed to promote plant growth contain phosphorus. Using fish emulsion or kelp fertilizer is an effective way to ensure your seeds and seedlings receive the phosphorus they need.
Generally, you should give your seedlings about a quarter of the recommended dose of the fertilizer on the label. Then, you should gradually increase the strength of the solution as your seedlings grow.
When your seedlings begin to show signs of growth, it is time to start feeding them. As a general rule, vegetable and flower seedlings should be fed with a mild fertilizer once they have two or three sets of true leaves. However, the rate at which you feed your seedlings is not as important as the type of fertilizer you use.
Some fertilizers are better than others. For example, a liquid form of fertilizer is faster and easier to use than granular or synthetic fertilizer. You should also try to avoid the use of a seedling mixture that contains too much salt.
Salt is sensitive to the outer layer of the seedling leaves. This can cause the seeds to pull moisture into the salt solution, resulting in a premature shriveling of the seedling.
Many seedlings are able to grow without any supplemental nutrition for a couple of weeks. However, it is not unusual for them to experience abnormal growth due to a nutrient disorder. Taking a soil test can help identify a nutrient deficiency.
When you are ready to give your seedlings the nutrients they need, you should look for a liquid or granular fertilizer with a 1-2-1 N-P-K ratio. Make sure you use a fertilizer that is unscented.

- 🌱【Elevated for Enhanced Growth】Bonviee upgraded seedling trays feature taller lids, offering your young plants ample room to thrive. This extra height benefits not only seed germination but also the early stages of plant cutting development, allowing tender plants to flourish for longer periods within the seed starter trays.
- 🌱【See-Through Design】Crafted with transparent materials, both the upper lid and the seedling tray are clear, enabling you to directly observe the growth of your plant roots without disrupting their natural progress.
- 🌱【Eco-Friendly and Easy to Clean】Made with eco-conscious users in mind, these cups are not only reusable but also washable, ensuring a long-lasting and eco-friendly solution for your gardening needs.
- 🌱【Optimal Drainage and Adjustable Ventilation】The presence of drainage holes at the base ensures root health is maintained by preventing waterlogging and root rot. Additionally, the adjustable ventilation cover on the lid allows you to control the humidity and airflow, catering to the specific needs of your plants.
- 🌱【Compatible with Heat Mats & Plant Lights】These trays can be used in a temperature range below 48°C. They serve as a fantastic method to cultivate a vibrant and thriving garden. The Bonviee seedling trays come with 10 packs seed starter kits, making them your ideal companions for planting and breeding seedlings.
Last update on 2026-07-11 / Affiliate links / Images from Amazon Product Advertising API
Transplanting into the garden
Transplanting seeds and seedlings into the garden is a great way to extend the growing season of plants. While it takes a little bit of time and care, the process is rewarding and your plants will thrive once they are in the ground.
Before you start planting, check the weather forecast and set out your transplants on a day with favorable conditions. Plants that are cold-sensitive should not be planted before the first frost. If you are planting a heat-loving plant, you should wait until nighttime temperatures are above 60degC.
To protect your transplants, you can place them in a cold frame. Another option is to mulch your soil to keep it moist. The mulch will regulate the temperature and help keep the moisture from evaporating.
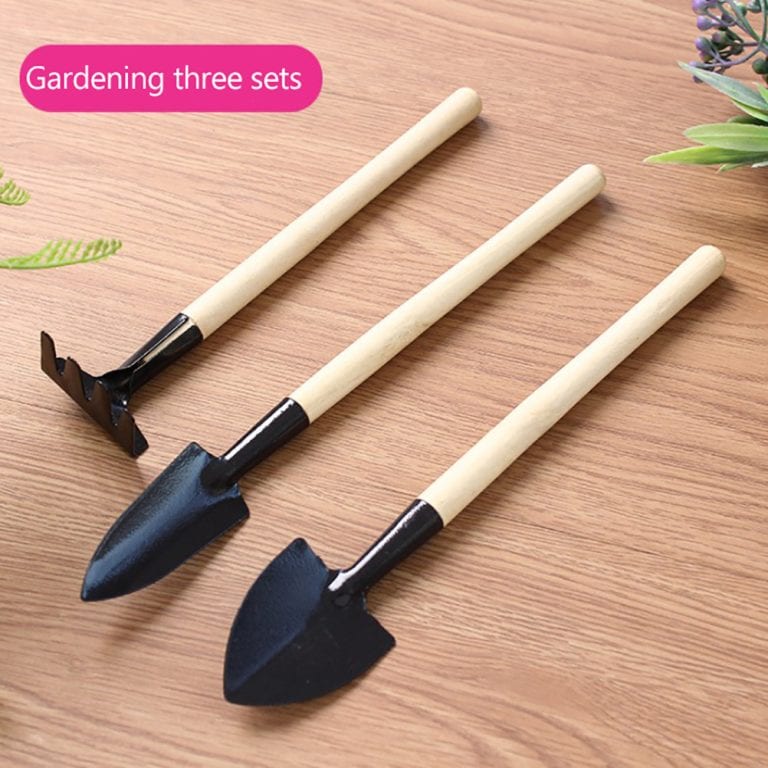
To make your transplanting process easier, use a hand trowel to dig a hole in the ground big enough to accommodate your seedlings. Fill the hole with starter fertilizer and water. After the hole is filled, add the seedlings and cover them with a few inches of compost. Be sure to aerate the compost.
You can also use a dibber or pencil to lever the roots out of the compost.
Seedlings are most sensitive during the first three to four weeks of their life cycle. They need time to adjust to their new environment and acclimatize to the sunlight. In fact, you should avoid the intense midday sun and instead set them out in the early morning hours or at dusk.
It is important to keep your transplants out of direct sunlight, as it can damage their leaves and stems. During the first few weeks of the growing season, it is best to set them out in filtered light.
As your plants grow, they will fill your plot with lush greenery. Keep track of your transplant dates so you can plan your garden accordingly for future years.
Remember to remove the plastic nursery trays from the starting mix and replace them with a fresh batch. The plastic trays tend to degrade over time.